> ## Documentation Index
> Fetch the complete documentation index at: https://www.osohq.com/docs/llms.txt
> Use this file to discover all available pages before exploring further.
# Oso Cloud Quickstart
> Authorize your first user with Oso Cloud
Get authorization working in your app in **under 10 minutes**.
You will:
1. Create an authorization policy.
2. Add user facts.
3. Make your first authorization check.
## What you'll build
a basic document-sharing system where:
* **Alice** (owner) can view and edit the budget document.
* **Bob** (viewer) can only view the budget document.
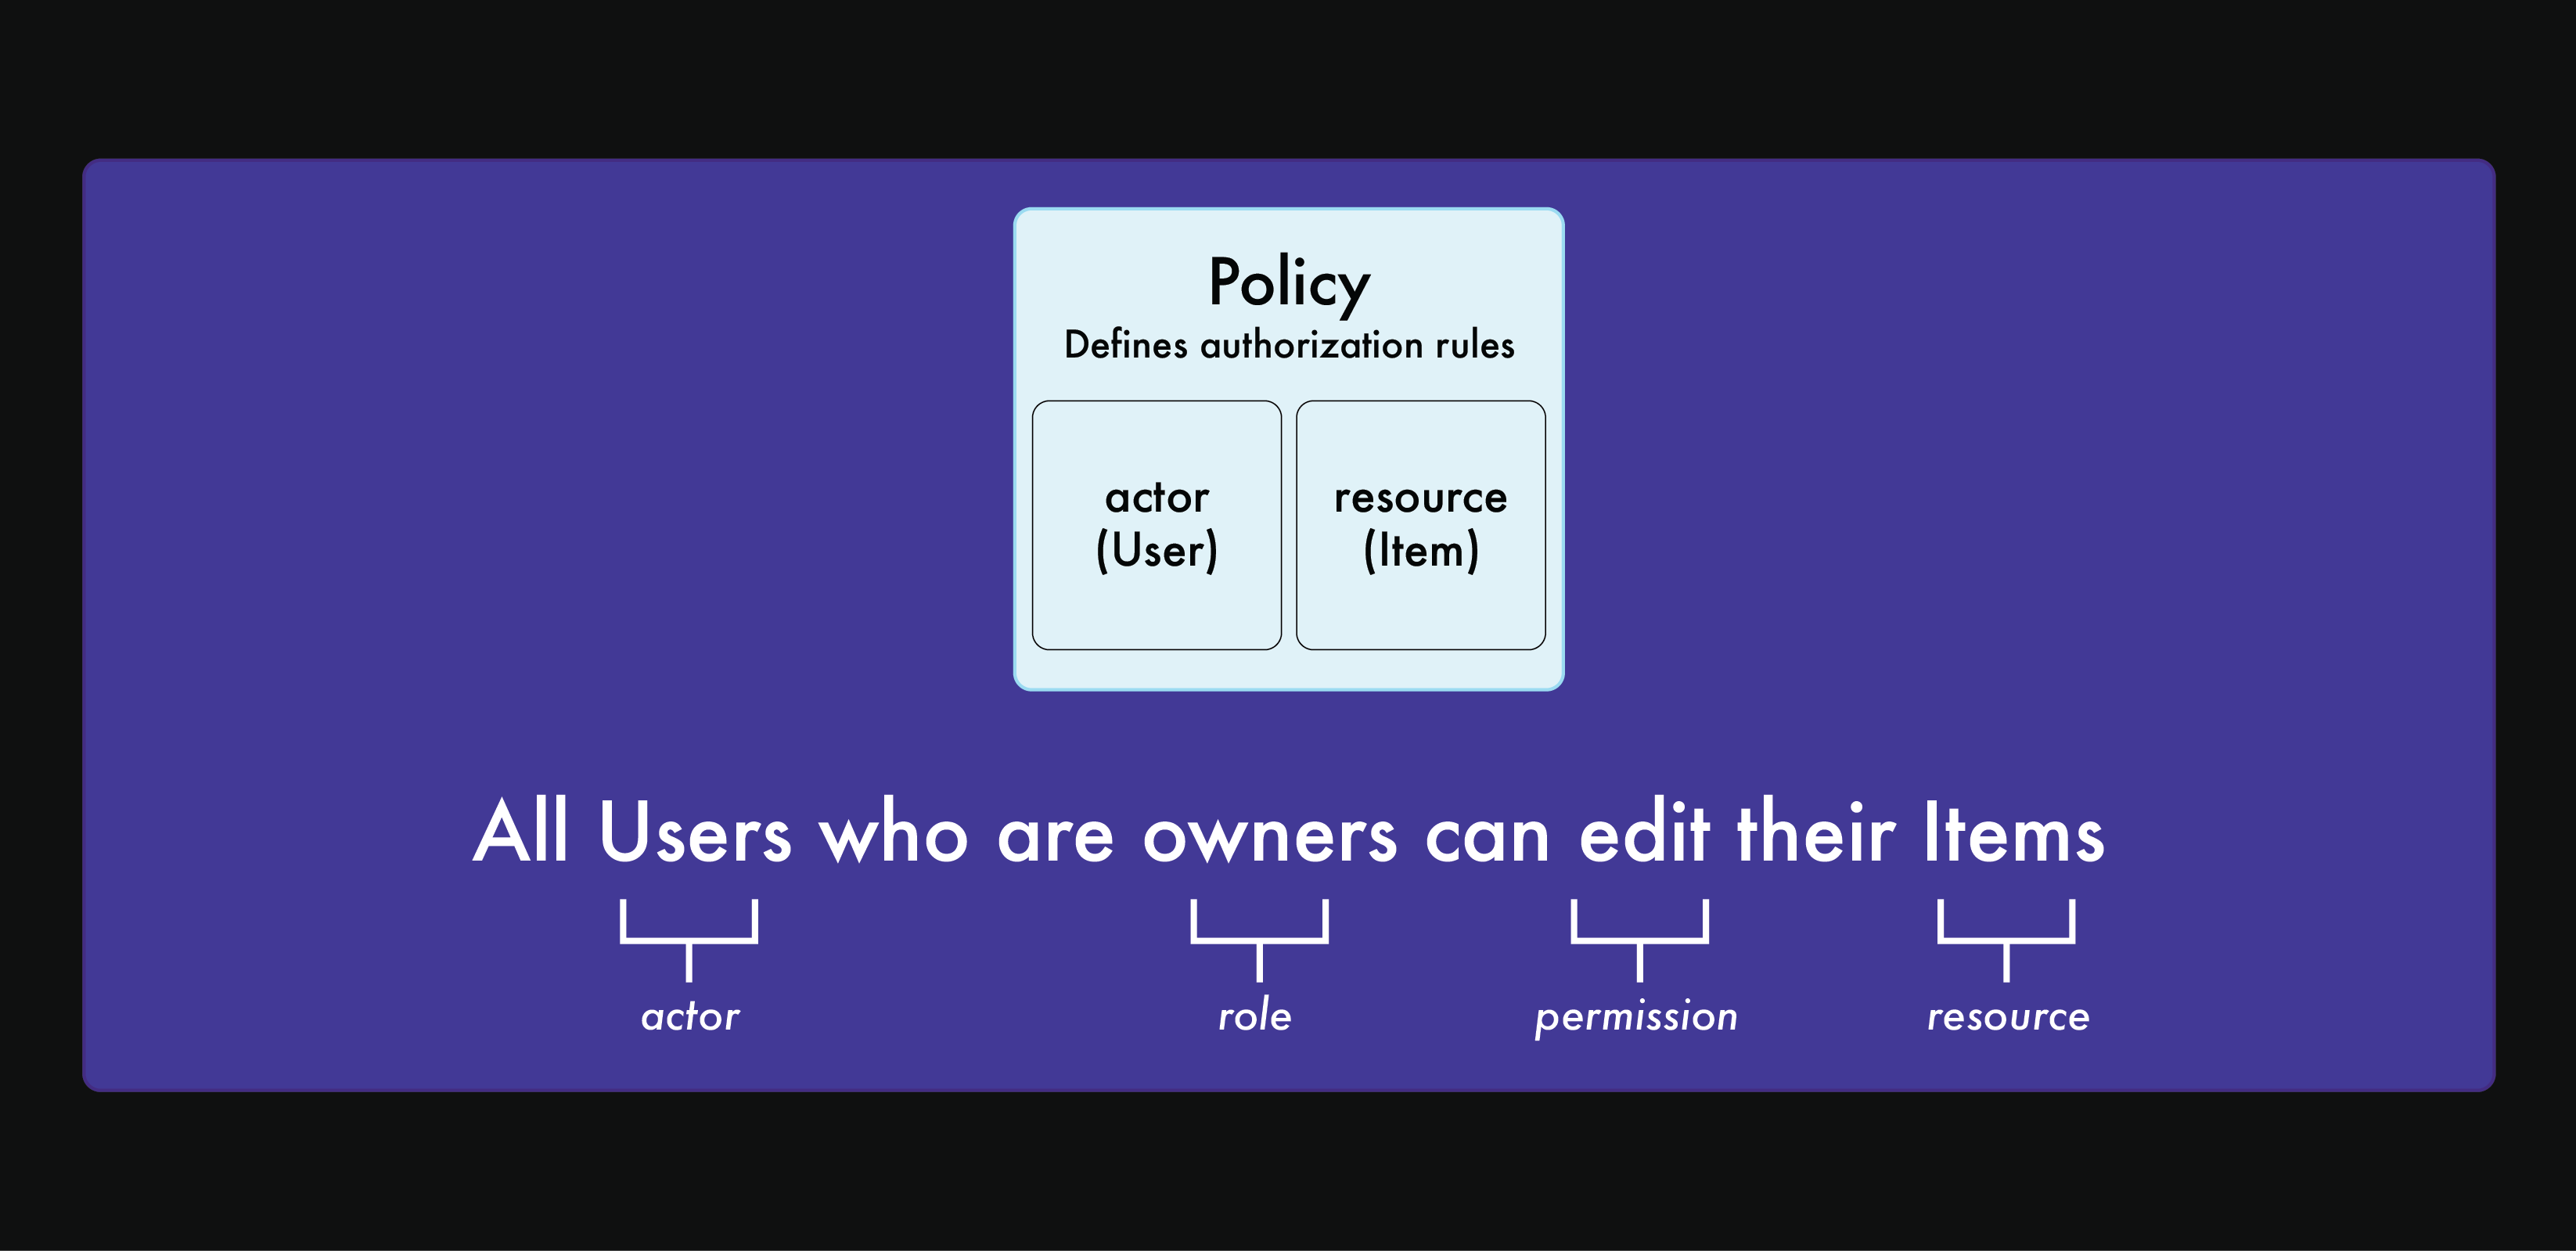
## How Oso Cloud works
Oso Cloud evaluates **authorization requests** using two components:
* **Policies** — Rules written in [Polar](/reference/polar/introduction) defining who can do what.
* **Facts** — Data about your users, resources, and relationships.
When a request comes in, Oso Cloud checks the policy against your facts to decide access.
 ## Step 1: sign up for Oso Cloud
[Create your free account](https://ui.osohq.com/) — no credit card required.
The Developer tier includes **5 developers** and **100 monthly active users**.
## Step 2: create your first policy
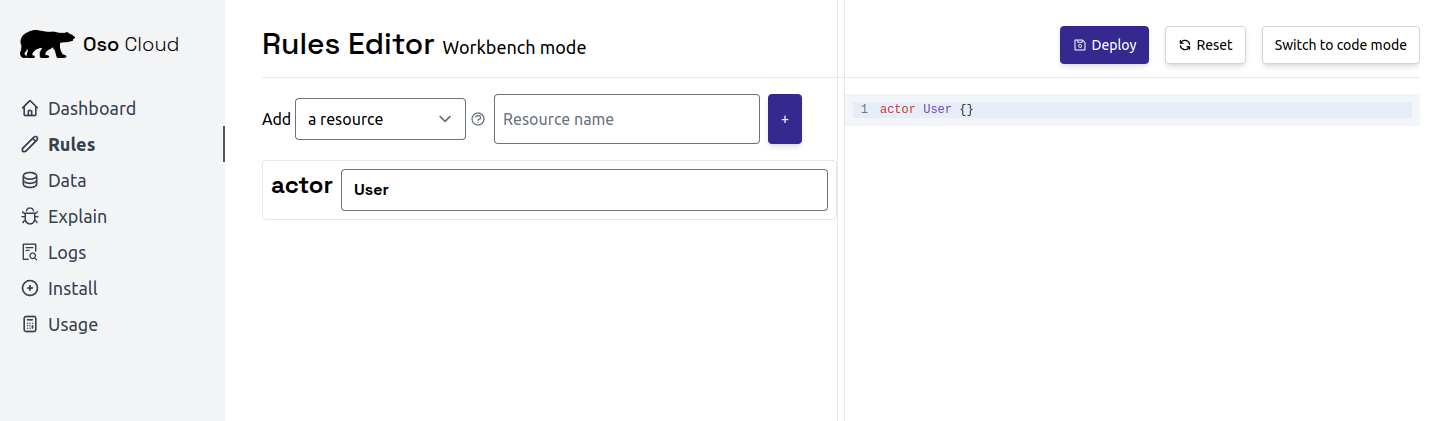
Open the [Rules Editor](https://ui.osohq.com/rules-editor/) and switch to Workbench mode.
## Step 1: sign up for Oso Cloud
[Create your free account](https://ui.osohq.com/) — no credit card required.
The Developer tier includes **5 developers** and **100 monthly active users**.
## Step 2: create your first policy
Open the [Rules Editor](https://ui.osohq.com/rules-editor/) and switch to Workbench mode.
 ### Add a resource
Create a **Document** resource to represent files users can access.
1. Click the input box next to `Add a resource`
2. Type "Document"
3. Click the `+` icon
### Add a resource
Create a **Document** resource to represent files users can access.
1. Click the input box next to `Add a resource`
2. Type "Document"
3. Click the `+` icon
 ### Review the generated policy
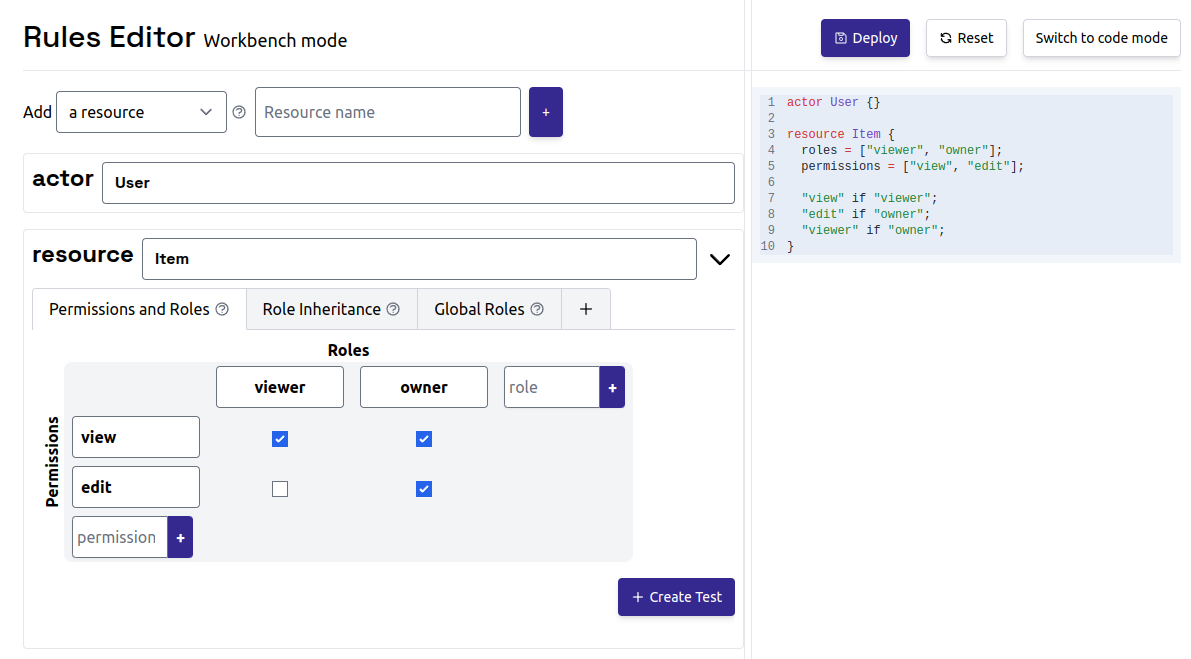
Oso Cloud generates a policy with these components:
**Actor**: `User` (someone requesting access)
**Resource**: `Document` (the file being protected)
**Roles**: `viewer` and `owner`
**Permissions by role:**
* `viewer` can view documents
* `owner` can view and edit documents
### Deploy the policy
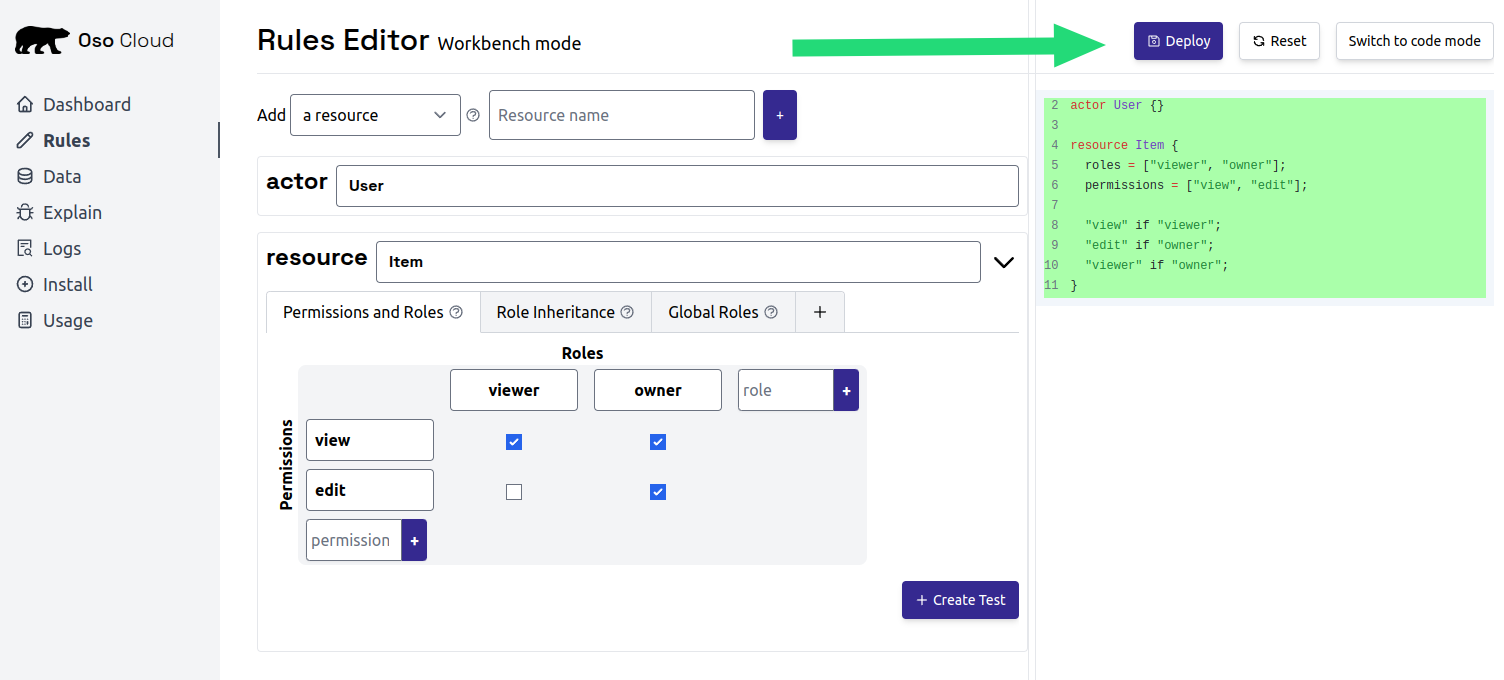
Click **Deploy** in the top right to activate your policy.
### Review the generated policy
Oso Cloud generates a policy with these components:
**Actor**: `User` (someone requesting access)
**Resource**: `Document` (the file being protected)
**Roles**: `viewer` and `owner`
**Permissions by role:**
* `viewer` can view documents
* `owner` can view and edit documents
### Deploy the policy
Click **Deploy** in the top right to activate your policy.
 ## Add user and role facts
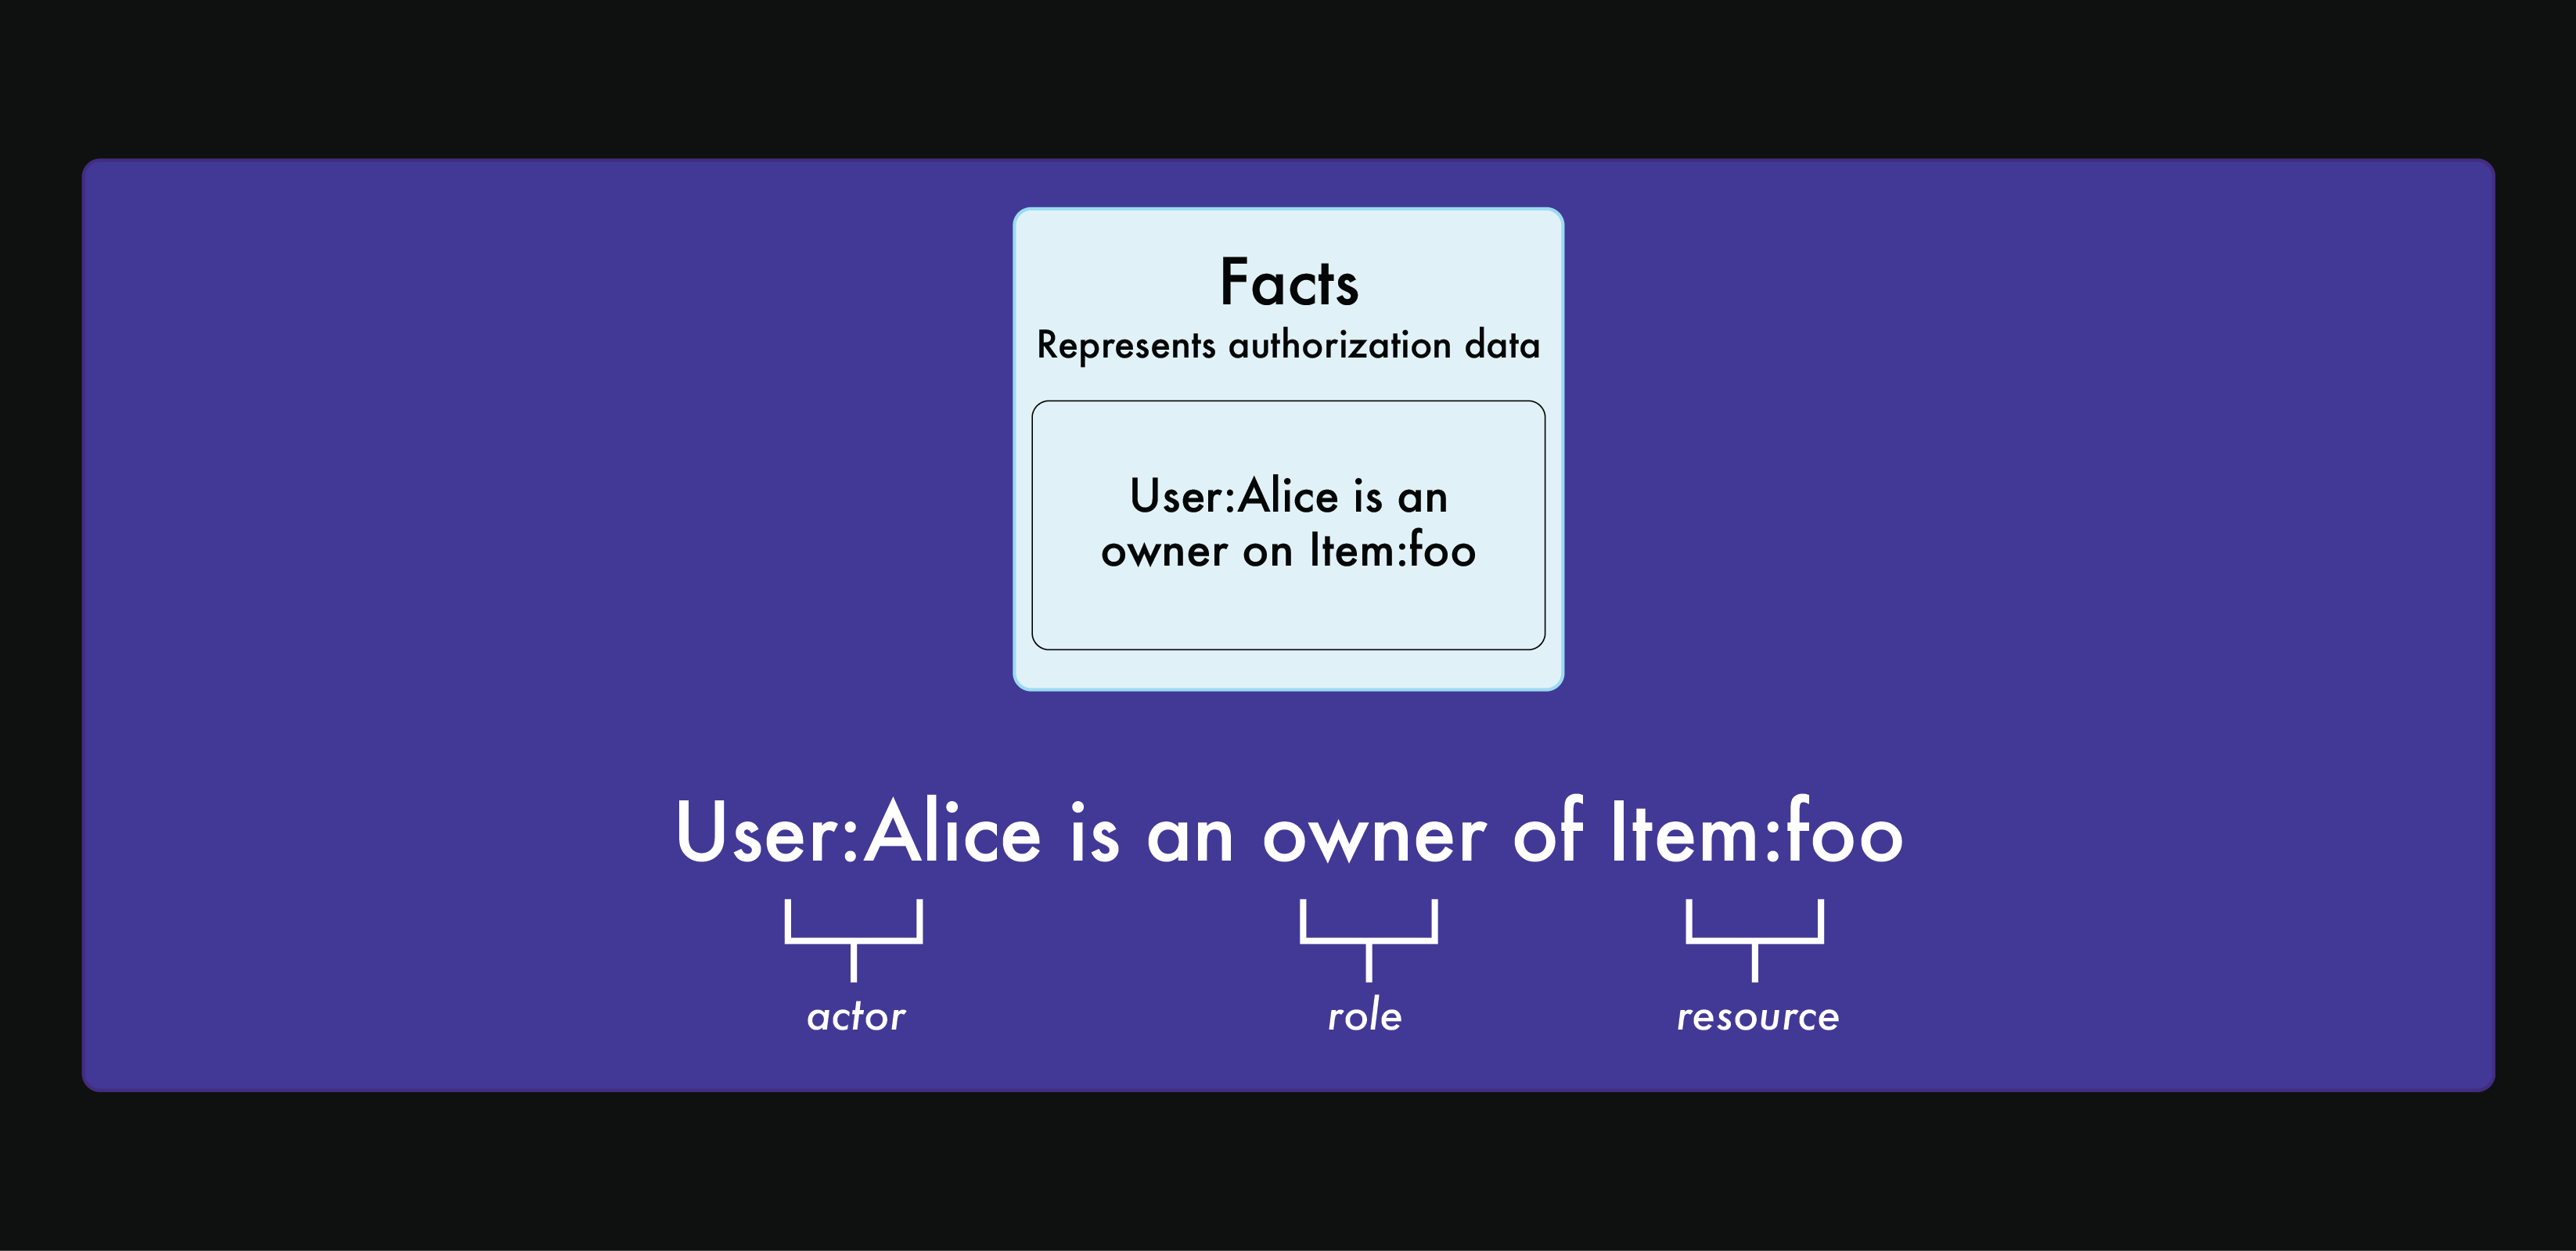 **Facts** store the current state of users and resources.
In this example:
-**Alice** owns the budget document.
-**Bob** views the budget document.
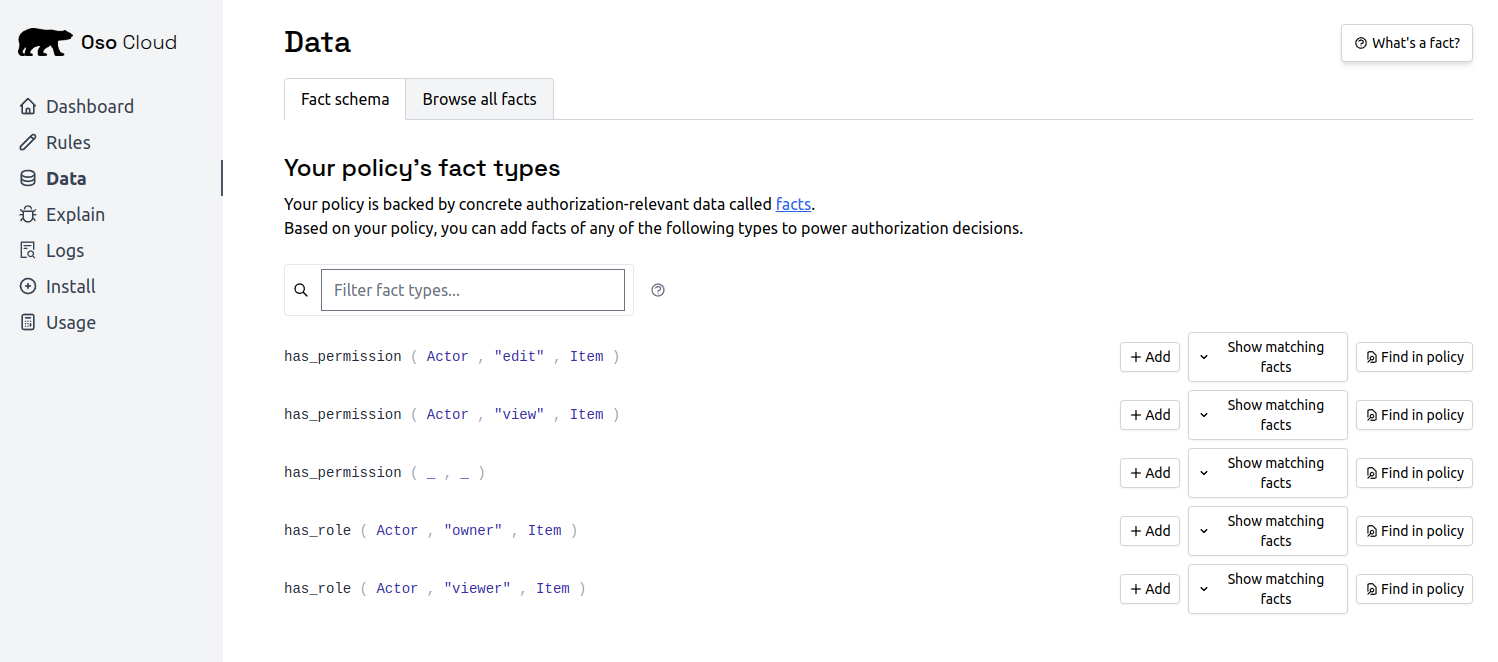
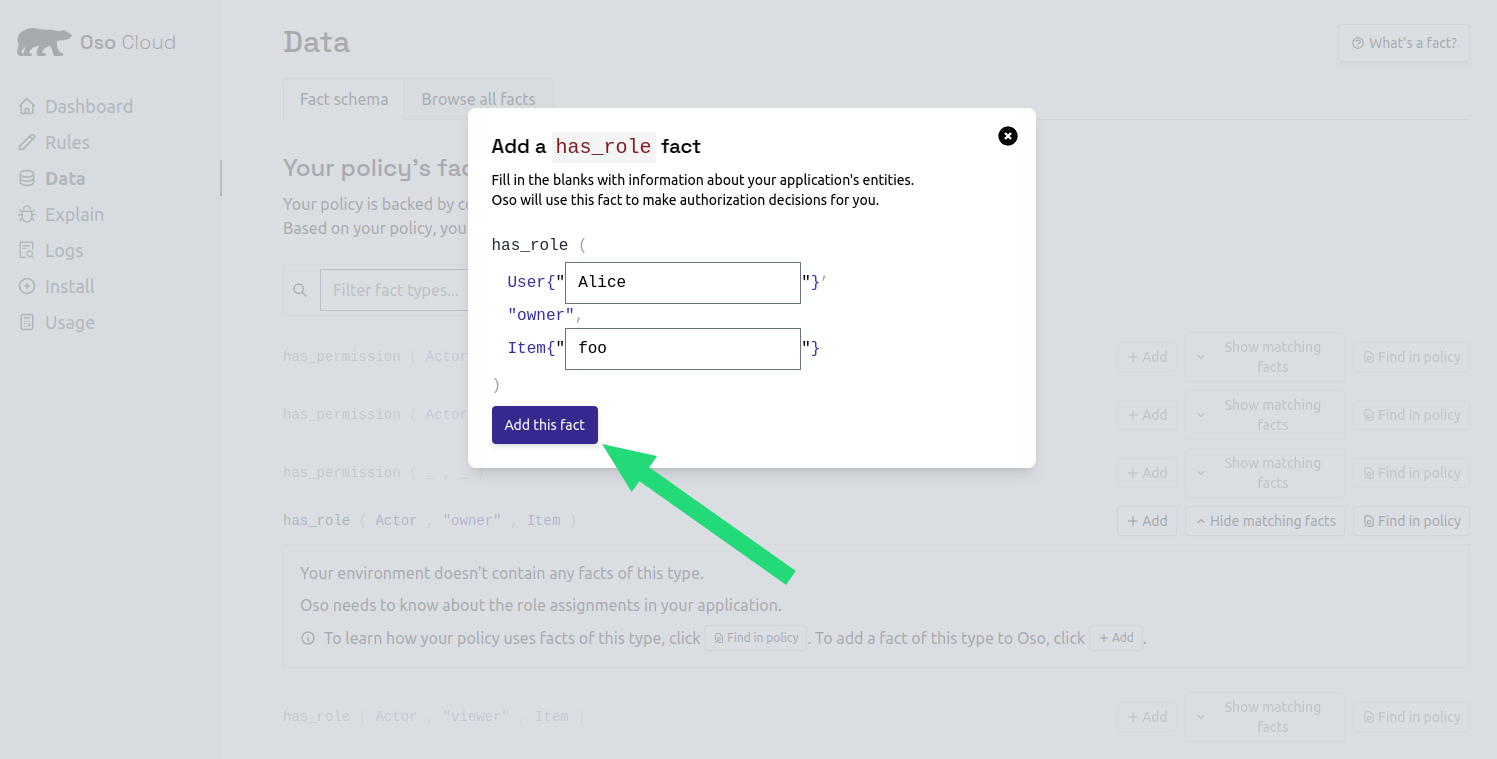
### Add Alice as owner
1. Open the [Data tab](https://ui.osohq.com/facts/)
2. Click `Add` next to `has_role ( Actor, "owner", Document )`
**Facts** store the current state of users and resources.
In this example:
-**Alice** owns the budget document.
-**Bob** views the budget document.
### Add Alice as owner
1. Open the [Data tab](https://ui.osohq.com/facts/)
2. Click `Add` next to `has_role ( Actor, "owner", Document )`
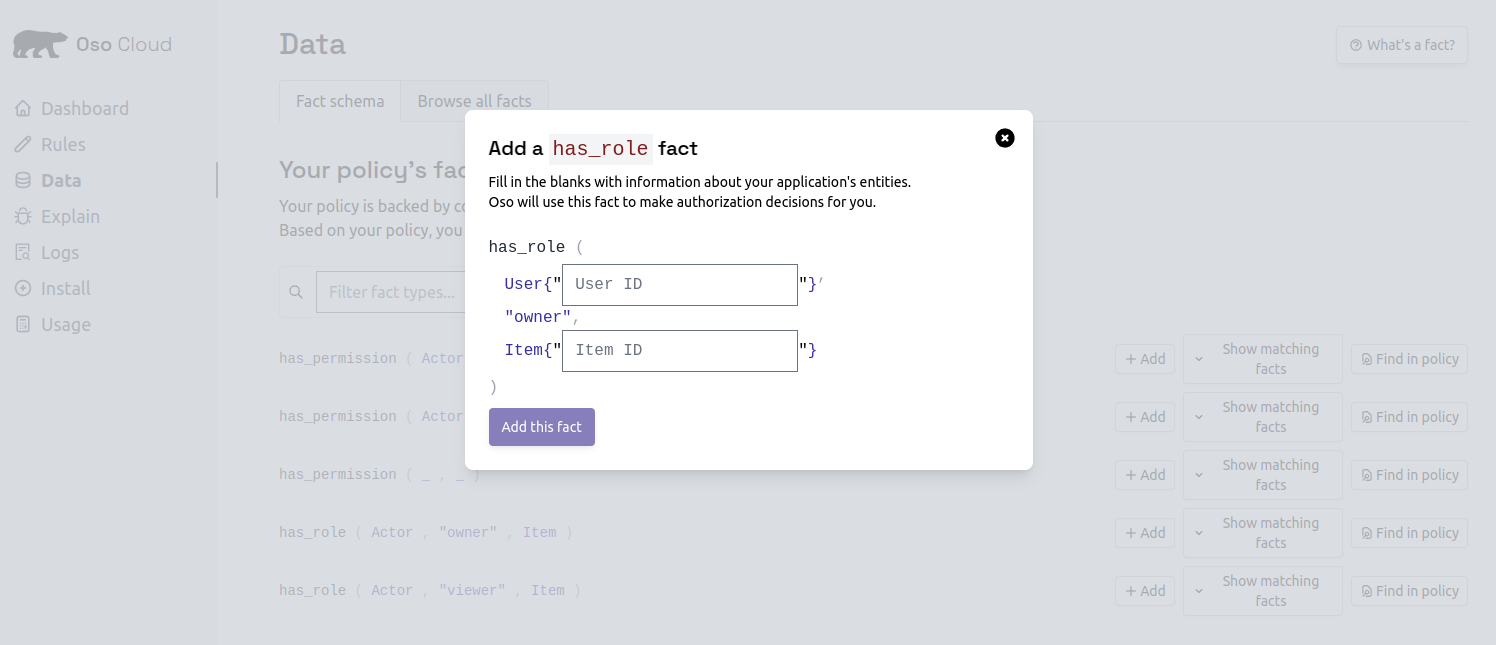
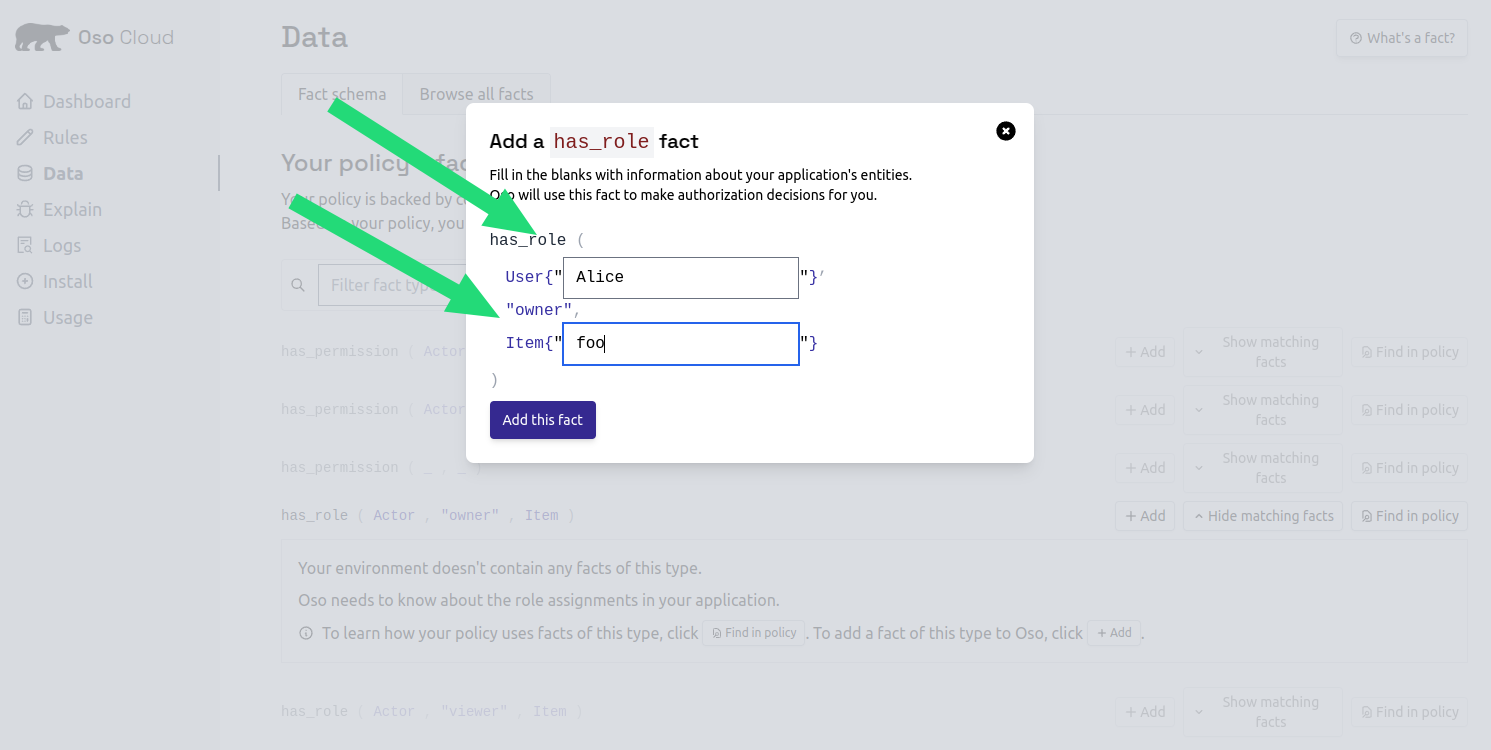
 3. Enter "alice" as the User ID
4. Enter "budget-2024" as the document name
5. Click `Add this fact`
3. Enter "alice" as the User ID
4. Enter "budget-2024" as the document name
5. Click `Add this fact`
 ### Add Bob as viewer
1. Click `Add` next to `has_role ( Actor, "viewer", Document )`
2. Enter "bob" as the User ID
3. Enter "budget-2024" as the document name
4. Click `Add this fact`
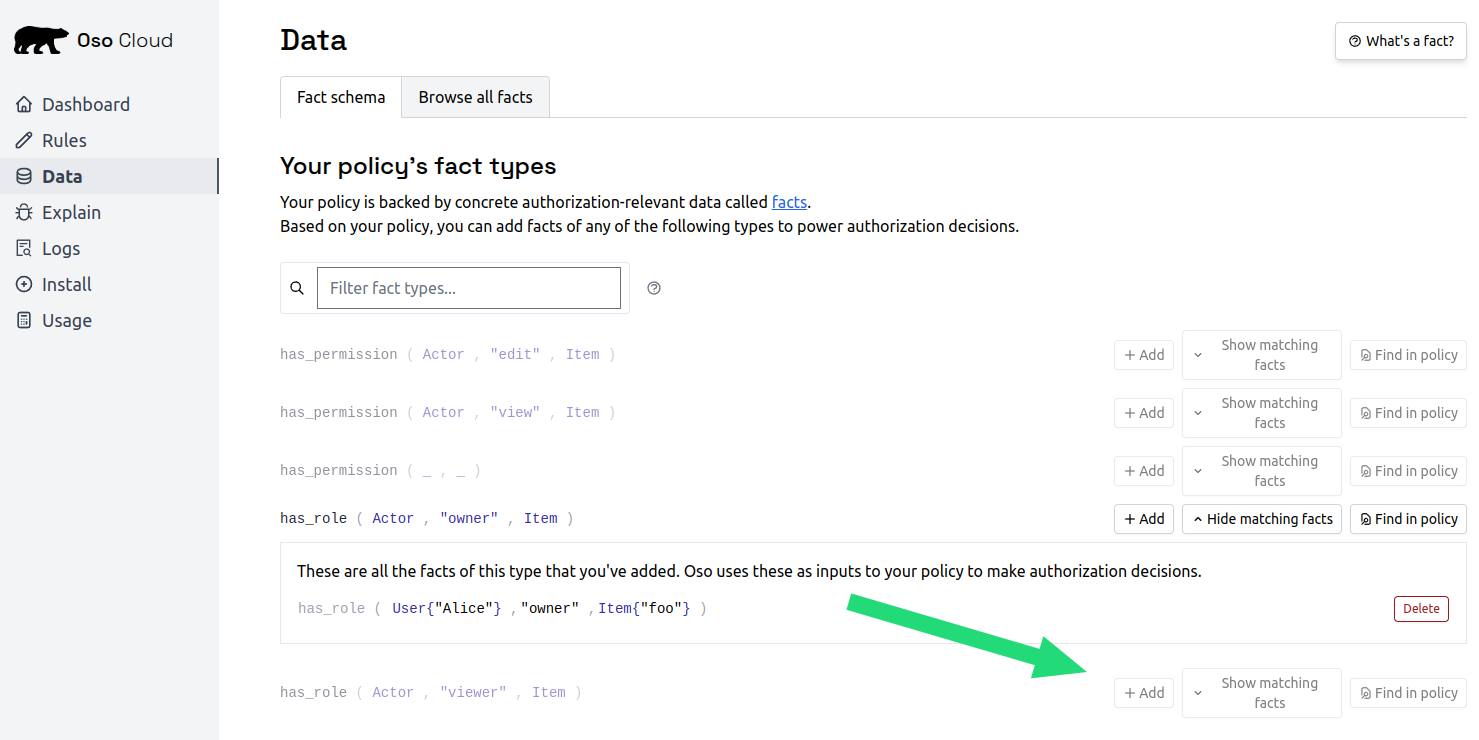
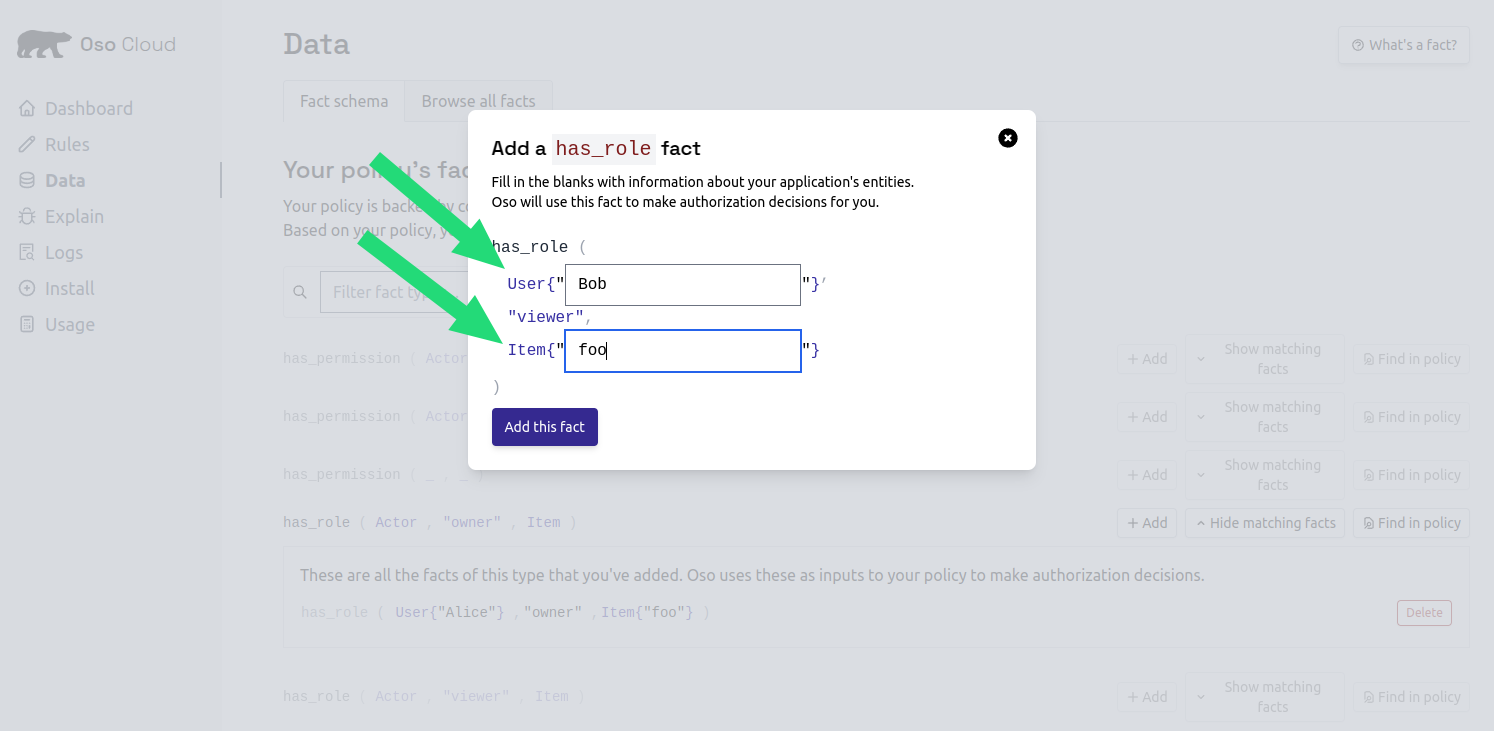
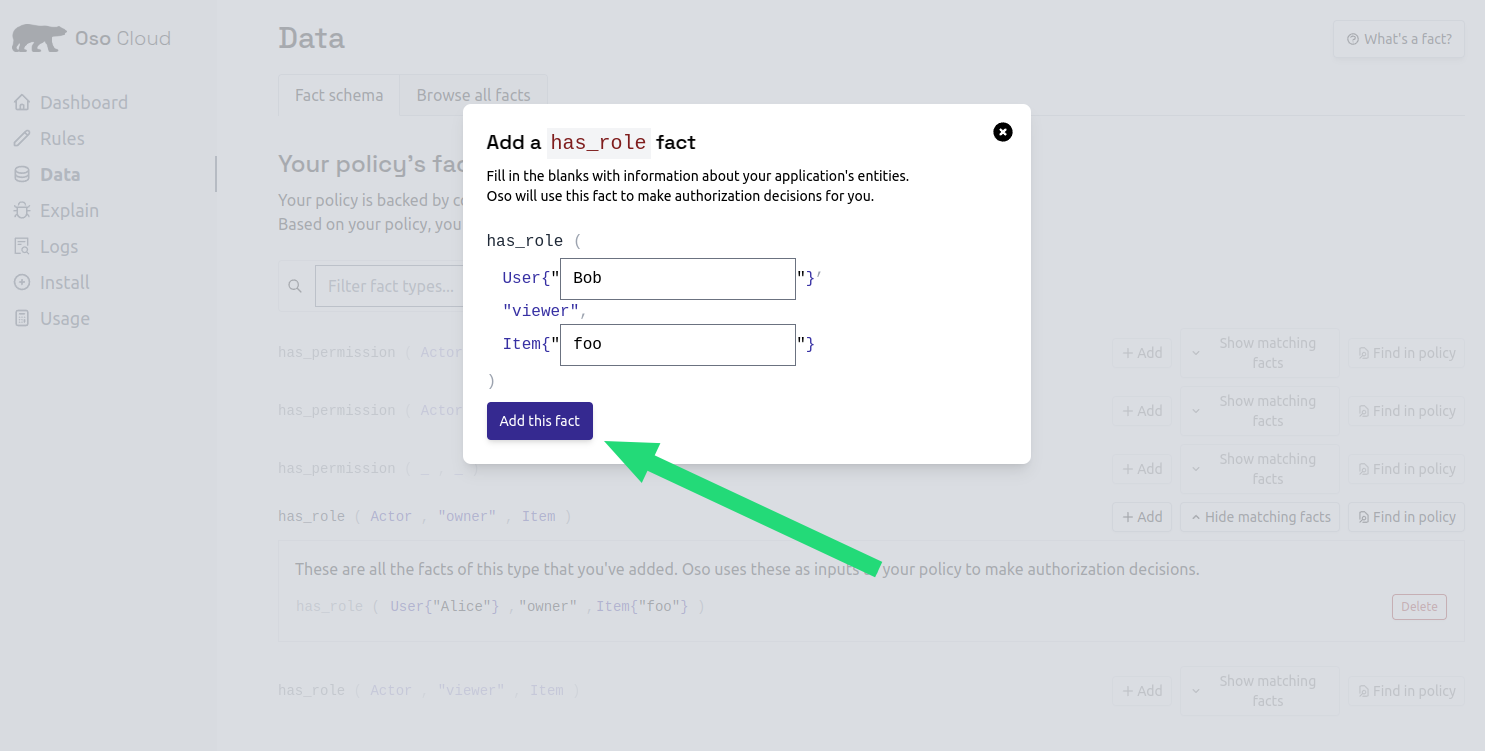
### Add Bob as viewer
1. Click `Add` next to `has_role ( Actor, "viewer", Document )`
2. Enter "bob" as the User ID
3. Enter "budget-2024" as the document name
4. Click `Add this fact`
 You now have a working authorization model.
## Step 4: test authorization in the console
Test your setup by running authorization decisions in the Oso console.
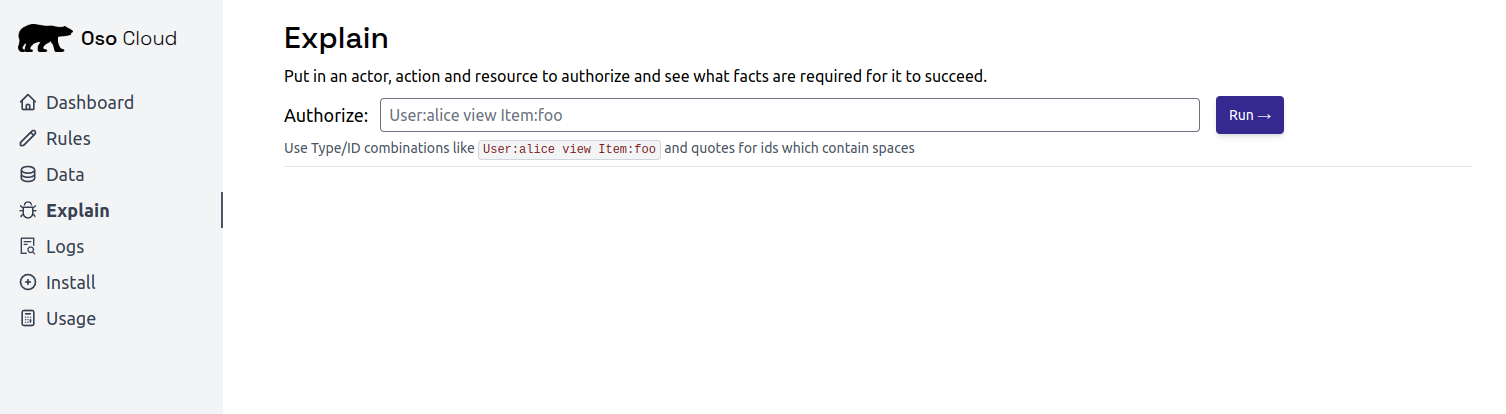
Open the [Explain tab](https://ui.osohq.com/explain/) to run authorization checks.
You now have a working authorization model.
## Step 4: test authorization in the console
Test your setup by running authorization decisions in the Oso console.
Open the [Explain tab](https://ui.osohq.com/explain/) to run authorization checks.
 ### Test Alice's access
1. Enter `User:alice view Document:budget-2024` in the Authorize field
2. Click `Run`
3. Result should be **✅ Allowed** (Alice is an owner)
### Test Alice's access
1. Enter `User:alice view Document:budget-2024` in the Authorize field
2. Click `Run`
3. Result should be **✅ Allowed** (Alice is an owner)
 ### Test Bob's access
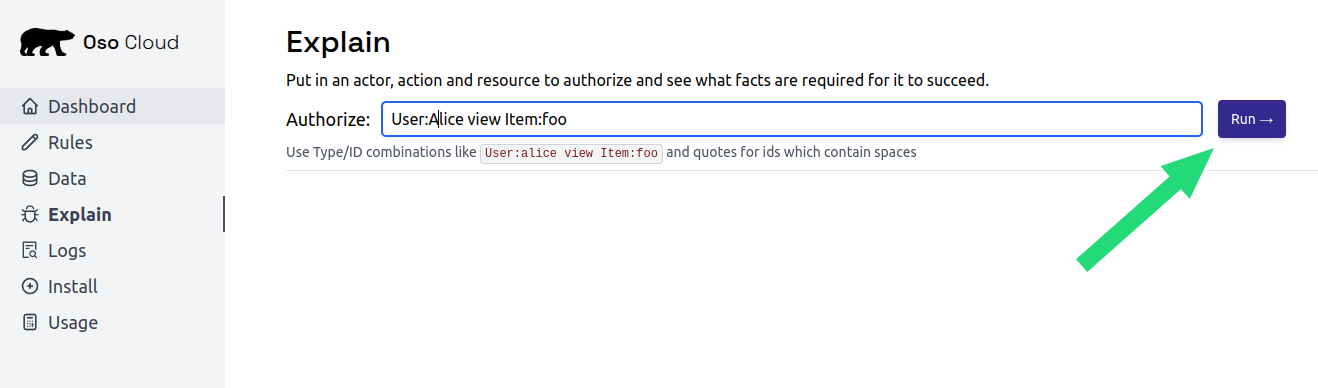
Try `User:bob edit Document:budget-2024`.
Result should be **❌ Denied** (Bob is only a viewer).
## Step 5: install the Oso Cloud CLI
Install the Oso Cloud CLI to start making authorization checks.
```bash theme={null}
curl -L https://cloud.osohq.com/install.sh | bash
```
```bash theme={null}
> Invoke-WebRequest "https://d3i4cc4dqewpo9.cloudfront.net/latest/oso_cli.exe" -OutFile C:\\oso_cli.exe
```
## Step 6: get your API key
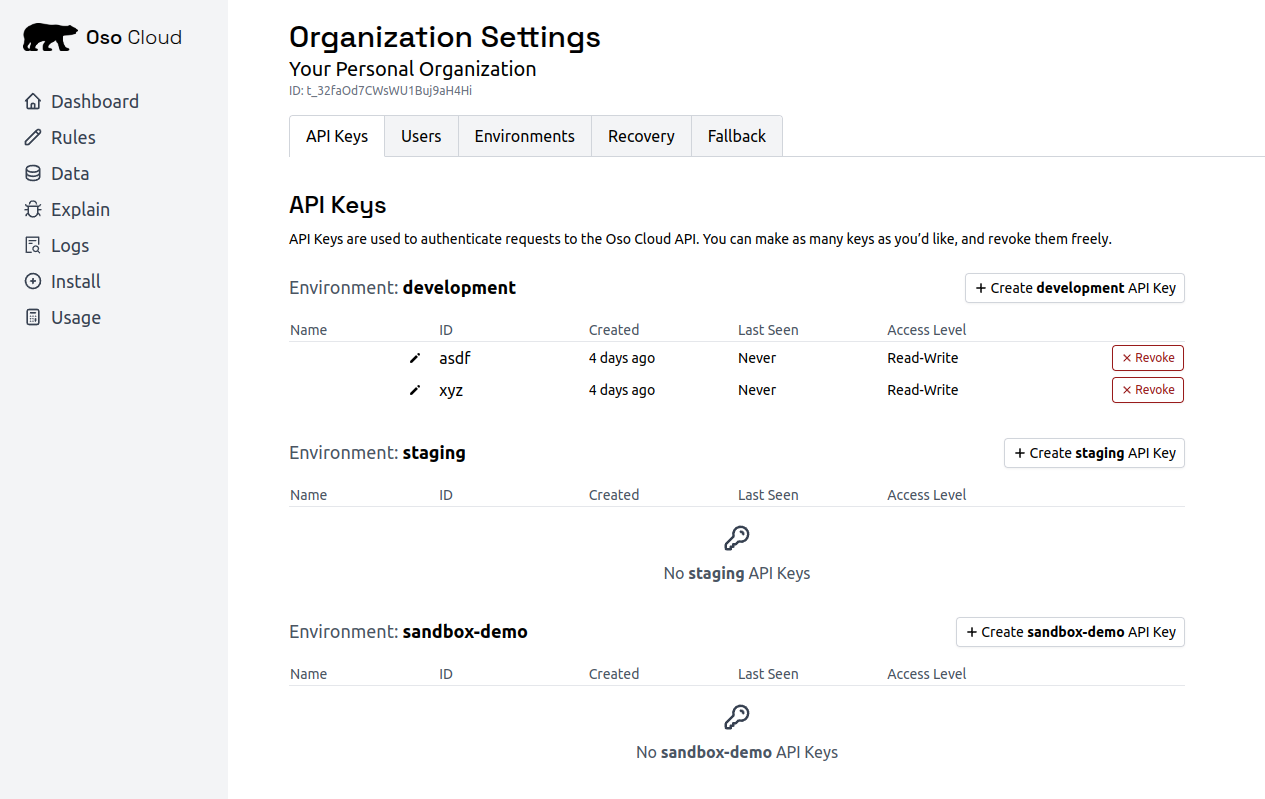
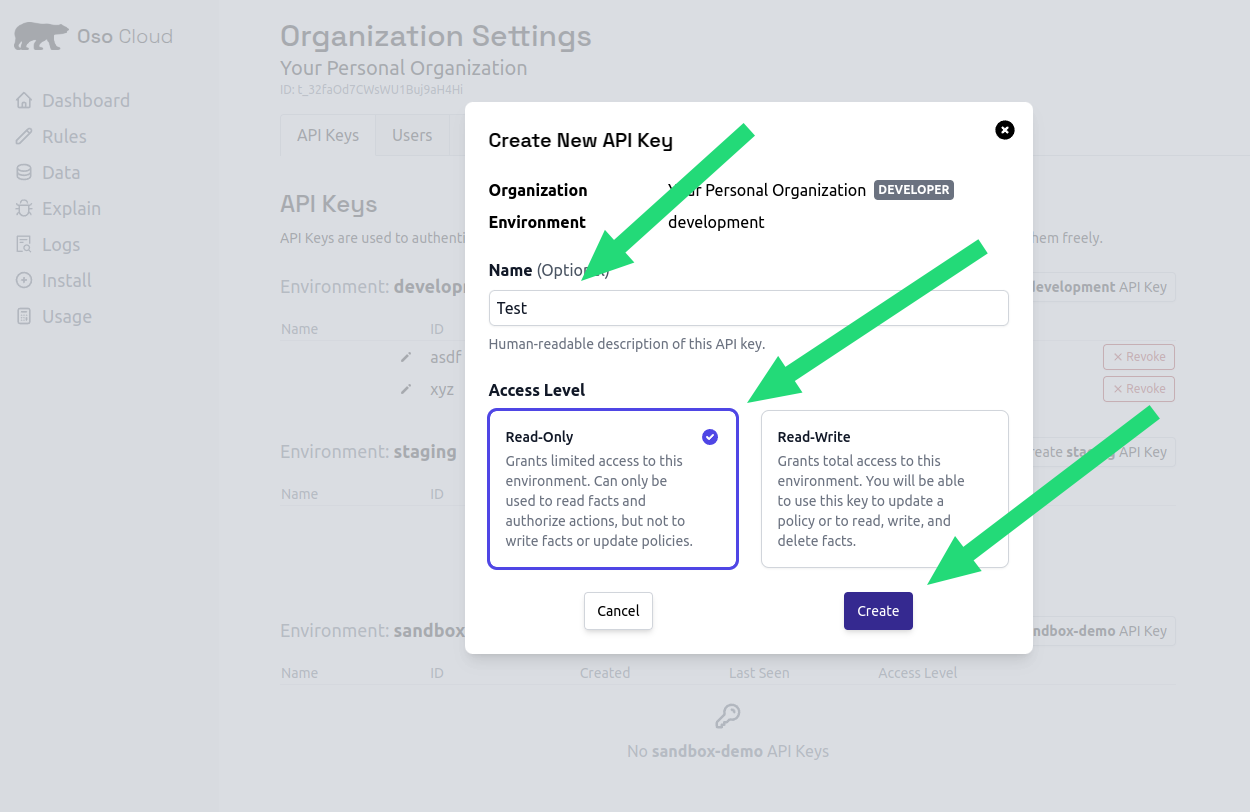
Create an API key to authenticate your application.
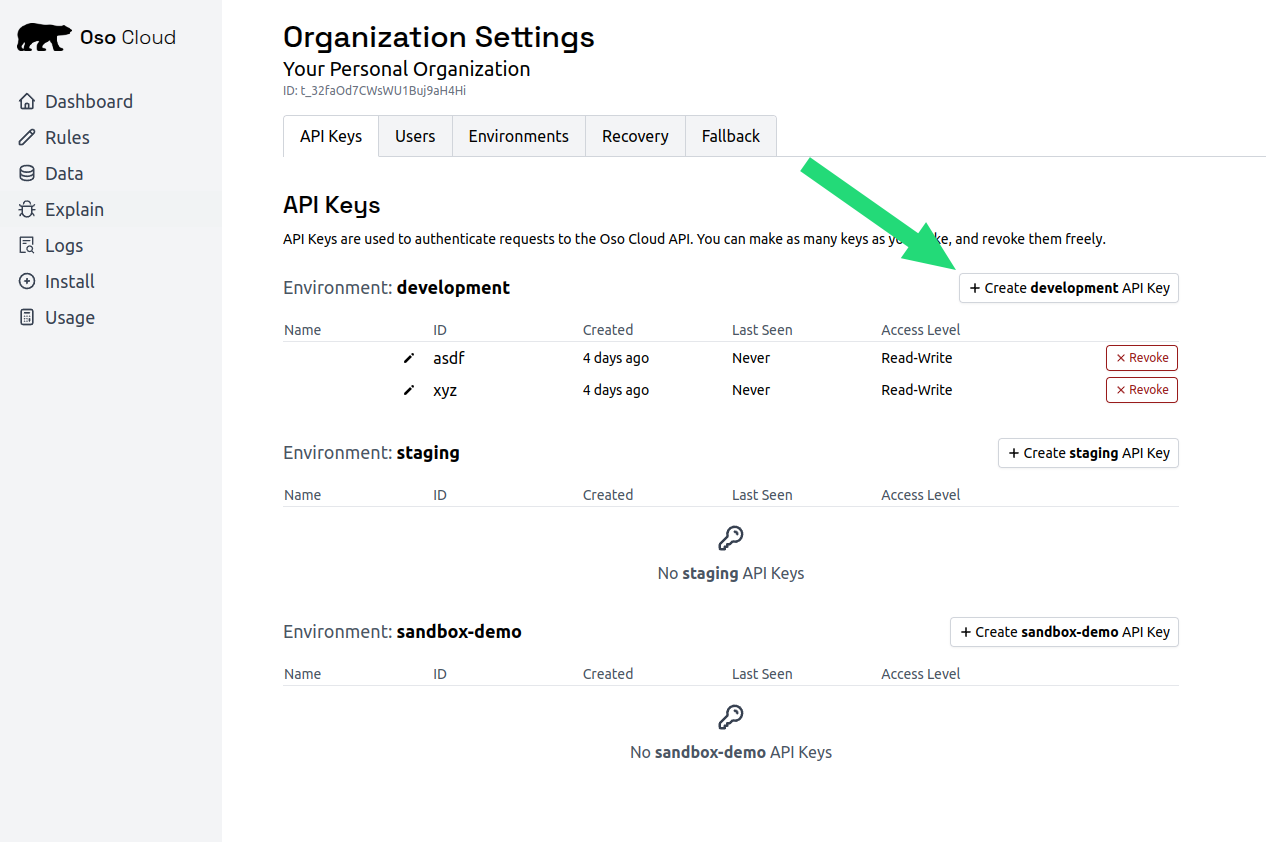
1. Go to [API Keys settings](https://ui.osohq.com/settings/?api-keys)
2. Click `Create development API key`
3. Name it "Quickstart"
4. Select `Read-Only` for testing
5. Click `Create` and copy the key
### Test Bob's access
Try `User:bob edit Document:budget-2024`.
Result should be **❌ Denied** (Bob is only a viewer).
## Step 5: install the Oso Cloud CLI
Install the Oso Cloud CLI to start making authorization checks.
```bash theme={null}
curl -L https://cloud.osohq.com/install.sh | bash
```
```bash theme={null}
> Invoke-WebRequest "https://d3i4cc4dqewpo9.cloudfront.net/latest/oso_cli.exe" -OutFile C:\\oso_cli.exe
```
## Step 6: get your API key
Create an API key to authenticate your application.
1. Go to [API Keys settings](https://ui.osohq.com/settings/?api-keys)
2. Click `Create development API key`
3. Name it "Quickstart"
4. Select `Read-Only` for testing
5. Click `Create` and copy the key
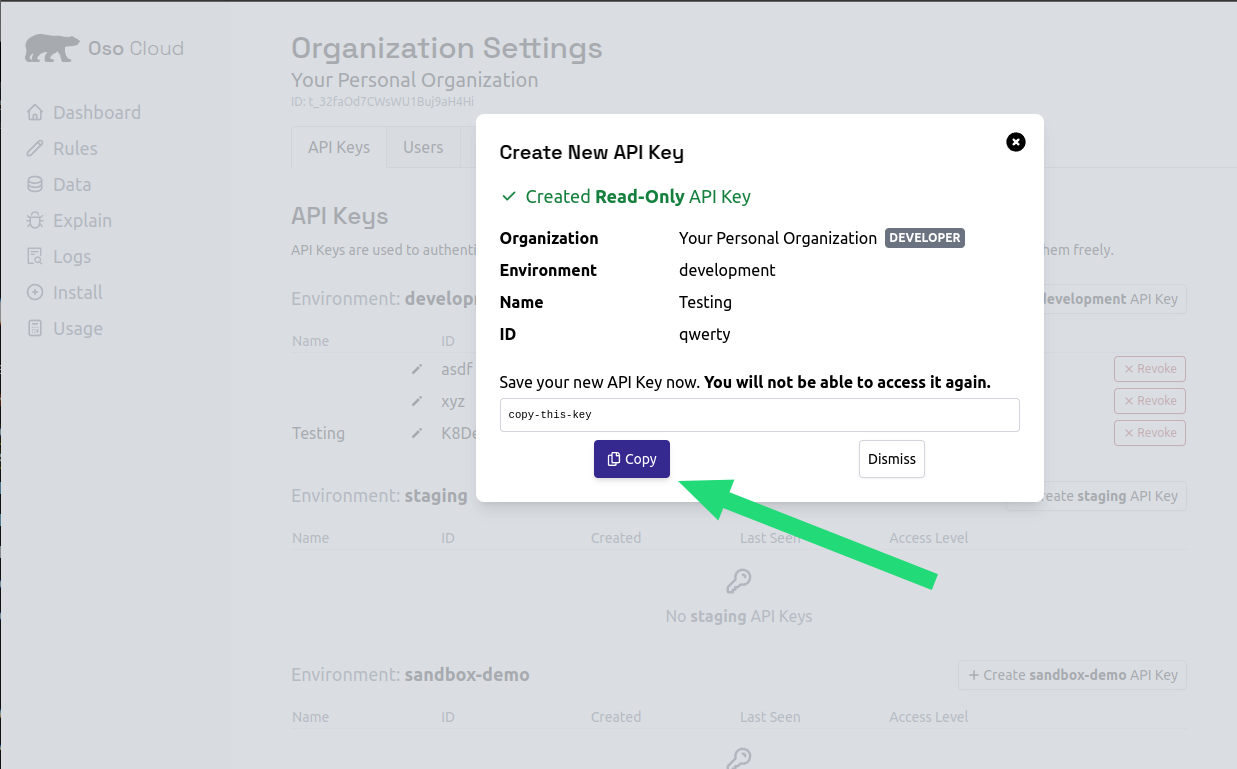 Store your API key securely as an environment variable. Never commit it to source code.
## Step 7: set your API key
```bash theme={null}
export OSO_AUTH=
```
```bash theme={null}
Set-Item -Path env:OSO_AUTH -Value “"
```
## Make authorization calls
Make authorization decisions in your application code.
**Test Alice's access**
```bash theme={null}
oso-cloud authorize User:alice edit Document:budget-2024
```
```bash theme={null}
oso_cloud authorize User:alice edit Document:budget-2024
```
**Test Bob's access**
```bash theme={null}
oso-cloud authorize User:bob edit Document:budget-2024
```
```bash theme={null}
oso_cloud authorize User:bob edit Document:budget-2024
```
Alice can edit because she's an owner. Bob cannot edit because he's only a viewer.
### Next steps:
* **[Model complex policies](/develop/policies/overview)**: learn Polar for advanced rules.
* **[Local Authorization](/develop/facts/local-authorization)**: filter directly in your DB for performance.
* **[Sync production facts](/develop/facts/sync-facts)**: keep facts up-to-date with application data.
* **[Schedule a technical consultation](https://www.osohq.com/meet-eng?utm_source=cloud-docs\&utm_content=deployment)**
Store your API key securely as an environment variable. Never commit it to source code.
## Step 7: set your API key
```bash theme={null}
export OSO_AUTH=
```
```bash theme={null}
Set-Item -Path env:OSO_AUTH -Value “"
```
## Make authorization calls
Make authorization decisions in your application code.
**Test Alice's access**
```bash theme={null}
oso-cloud authorize User:alice edit Document:budget-2024
```
```bash theme={null}
oso_cloud authorize User:alice edit Document:budget-2024
```
**Test Bob's access**
```bash theme={null}
oso-cloud authorize User:bob edit Document:budget-2024
```
```bash theme={null}
oso_cloud authorize User:bob edit Document:budget-2024
```
Alice can edit because she's an owner. Bob cannot edit because he's only a viewer.
### Next steps:
* **[Model complex policies](/develop/policies/overview)**: learn Polar for advanced rules.
* **[Local Authorization](/develop/facts/local-authorization)**: filter directly in your DB for performance.
* **[Sync production facts](/develop/facts/sync-facts)**: keep facts up-to-date with application data.
* **[Schedule a technical consultation](https://www.osohq.com/meet-eng?utm_source=cloud-docs\&utm_content=deployment)**